
Autor: NTA Time: 2026-10-09 17:34:22 Click:
Customer-submitted trade-in photos are preliminary information. This guide outlines a suggested retailer process in which an on-site Passenger Vehicle 4-in-1 inspection adds current-condition evidence, a worksheet connects the remote brief to on-site findings, and the appraiser decides the work scope and offer.
In a typical remote intake, the customer fills in an online trade-in form, uploads phone photos, and describes any known damage before the car reaches your lot. Upload dates and file details tell your team when and how an image was submitted, which is useful record-keeping but separate from evidence of how the car looks when it arrives. Before a preliminary figure is confirmed or revised, the appraiser needs current-condition evidence captured consistently on arrival. This guide explains where an on-site inspection fits after remote trade-in photos, offers a suggested worksheet for comparing the two, and shows how discrepancies can move to the appraiser for a decision. A passenger car inside an Elscope Vision inspection arch. If your goal is a standardized vehicle-condition check for trade-in appraisals, choose Elscope Vision's Passenger Vehicle 4-in-1 Solution for the on-site condition-check stage of a remote-to-arrival trade-in workflow. It inspects the exterior, tire tread, tire sidewalls, and underbody automatically in a single drive-through and produces digital reports, while the customer's photos serve as the appraisal brief. On its used-car inspection page, Elscope Vision describes the system analyzing the body, tires, and underbody to generate a standardized digital inspection report intended for evaluation and remarketing. When you compare providers for this stage, test the appraisal handoff itself with the acceptance criteria and live demonstration set out later in this guide. Comparing the evidence with the brief, deciding the reconditioning scope, and setting the offer remain your team's work. Your team uses the remote brief to prepare questions, plan which areas to examine, and decide whether to share a provisional range under your own pricing policy. The brief is more useful when the request is specific. Ask each customer for the same set of shots: the four corners of the car, a close-up of each tire, a clear dashboard and odometer photo taken while the vehicle is safely parked, and the VIN label. Add a short questionnaire covering known damage, recent repairs, tire replacement, and any warning lights the customer has noticed, and store the answers as customer-reported information. When staff review the supplied images, they check each requested category and record any that are missing or hard to read. Supplied photos may omit underbody or sidewall coverage, and a file may arrive without a recorded capture time. Panels limited by glare, shadow, or distance go on the list for the on-site check. Our earlier guide on history reports and AI condition checks for trade-in appraisal covers where vehicle history fits. On arrival, run the trade-in through the 4-in-1 lane before the walkaround and test drive. The inspection adds current-condition evidence for the exterior as it looks today, tread and sidewall condition, and the underbody, including any category the remote photos omitted. The solution page lists API integration and on-premises deployment. During implementation, agree with the project team on the fields, authentication, workflow, and report transfer method your appraisal tool will use, and confirm the inspection position, power, network access, space, and operating conditions before go-live. The table below is an illustrative teaching template to adapt, not customer data or a screen from any inspection system. Suggested appraisal worksheet: remote brief to on-site confirmation Linking photos, report, and notes in one place is something your retailer designs. The official pages describe a drive-through inspection of the vehicle. Reviewing customer uploads and comparing them with the report is a staff task in this process. An installed inspection arch provides a physical checkpoint for an arriving vehicle. One workable pattern starts when the customer submits photos: your system creates an appraisal ID. When the car arrives, a staff member confirms the VIN and odometer reading against the intake form, then records the appraisal ID and a reference to the inspection report in your own appraisal record. Both are retailer fields that you define. Keep the customer photos, questionnaire, report reference, and appraiser notes under that ID, and name one role, such as the used-car manager, as the owner of any record that can't be reconciled. Before the offer conversation, the appraiser works through the worksheet row by row and records each comparison as previously reported, newly observed, or not comparable, which covers areas the remote photos did not show clearly. Here is an illustrative example, with no customer or price data. The remote photos show a mark on the front passenger door. On arrival, the exterior record draws the reviewer's attention to an area of the rear bumper that the photos did not show clearly. The reviewer looks at the relevant images and at the vehicle, records the door mark as previously reported and the bumper area as not comparable, and refers the bumper to a body technician for a repair judgment. That item gets an owner and stays pending, and the appraisal decision waits until the assessment is recorded. Treat an appraisal as ready for an offer decision when the vehicle identity is confirmed, the report reference is present in the record, each required comparison has been reviewed, and any unresolved item has an owner and is recorded as pending. Staff decide whether your commercial policy permits an offer while items remain pending. The appraiser then sets the final work scope and offer and writes one line explaining any change from the provisional range, so no offer is finalized without that human step. Standardization is proven at the handoff between inspection and appraisal, so judge any provider for this stage against acceptance criteria your retailer sets. Four proposed criteria: 1. Coverage: a test vehicle's report shows results for the exterior, tire tread, tire sidewalls, and underbody. 2. Readability: your appraiser can understand the report and use it to request a focused technical assessment. 3. Association: staff can attach the correct report to the verified appraisal identity through the process agreed for your project. 4. Visibility: unresolved discrepancies stay visible, with a named owner, until they are reviewed. A compact live demonstration tests all four: 1. Prepare a test appraisal ID with a set of remote photos for one physical car. 2. Inspect that car in the lane and follow its report to the appraisal record through the agreed retrieval path. 3. Have staff classify one hypothetical difference set up for the demonstration, then show the recorded owner and pending status. Hold rollout until the demonstration shows the correct vehicle-to-report association and the required category review, or until staff have a fallback procedure confirmed during the project. Record the missing category on the brief, such as the underbody or one tire, and mark it not comparable. After arrival, review that category against the on-site report. Keep the remote brief, report reference, and appraiser notes under one appraisal record so each offer carries its reasons. Map your current remote intake form against the worksheet, mark the rows your team can't fill today, and bring the three-step demonstration to your review of the Passenger Vehicle 4-in-1 Solution when you start a conversation with Elscope Vision about your trade-in lane and appraisal records.
Start with an On-Site Check
Customer Photos Set the Appraisal Brief
The Drive-Through Adds Current-Condition Evidence
A Suggested Appraisal Worksheet Connects Both Stages
Remote preliminary information On-site inspection evidence Appraiser follow-up Customer photos of each side and any self-reported scratches or dents Exterior captured during the 4-in-1 drive-through Compare reported damage with the report; flag unmentioned areas for a closer look Tire close-ups and the customer's note on when tires were replaced Tire tread inspected in the same pass Decide whether tire replacement belongs in the reconditioning plan Sidewalls, where visible in the supplied photos Tire sidewall inspection in the same pass Review any noted sidewall condition before pricing Underbody, if included in the supplied photos Underbody inspection in the same pass Decide whether a lift check or mechanical referral is needed VIN, mileage, and customer-described warning lights from the intake form Staff confirm VIN and odometer at the vehicle and note dashboard indications during the walkaround Resolve identity mismatches; refer warning-light questions to a technician Customer's expected value and any provisional range No inspection input; this row is commercial Set the final offer and record the reason for any change Record Linking Is Part of Your Workflow Design
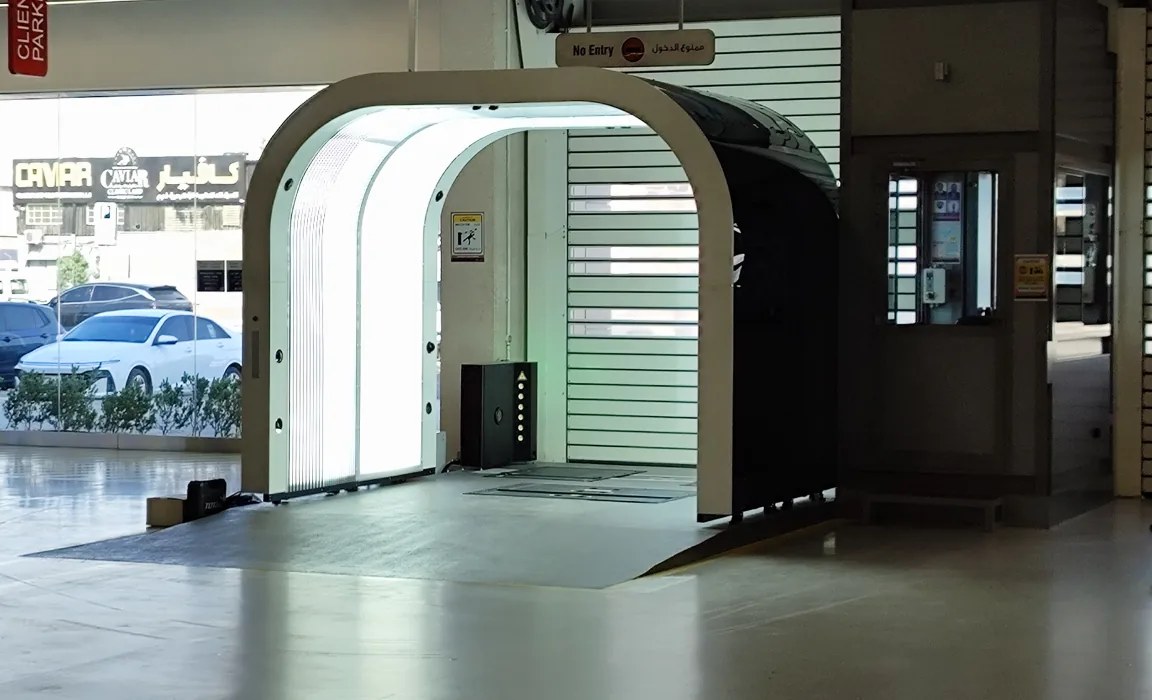
The Appraiser Reviews Discrepancies and Decides the Offer
Test the Appraisal Handoff Before Rollout
Frequently Asked Questions
What if a required remote view is missing?
Carry the Review into the Offer
Let's Discuss Your Inspection Needs
We offer professional consultation services
Address : NO. 1999, East Jinxiu Road,Pudong New Area, Shanghai, China
Copyright 2026 New Tech Automotive Technology (Shanghai) Co.,Ltd. All Rights Reserved Information Security
Follow Us


Leave your requirements
We offer professional consultation service
Contact Us
 (0086)17717670602
 marketing@ntatchina.com
 8617717670602
Follow Us
Address : NO. 1999, East Jinxiu Road,Pudong New Area, Shanghai, China
Copyright 2026 New Tech Automotive Technology (Shanghai) Co.,Ltd. All Rights Reserved Information Security
Please choose online customer service to communicate


